Follow the steps below to cancel a service on The PowerHost Portal:
Step-by-Step Process
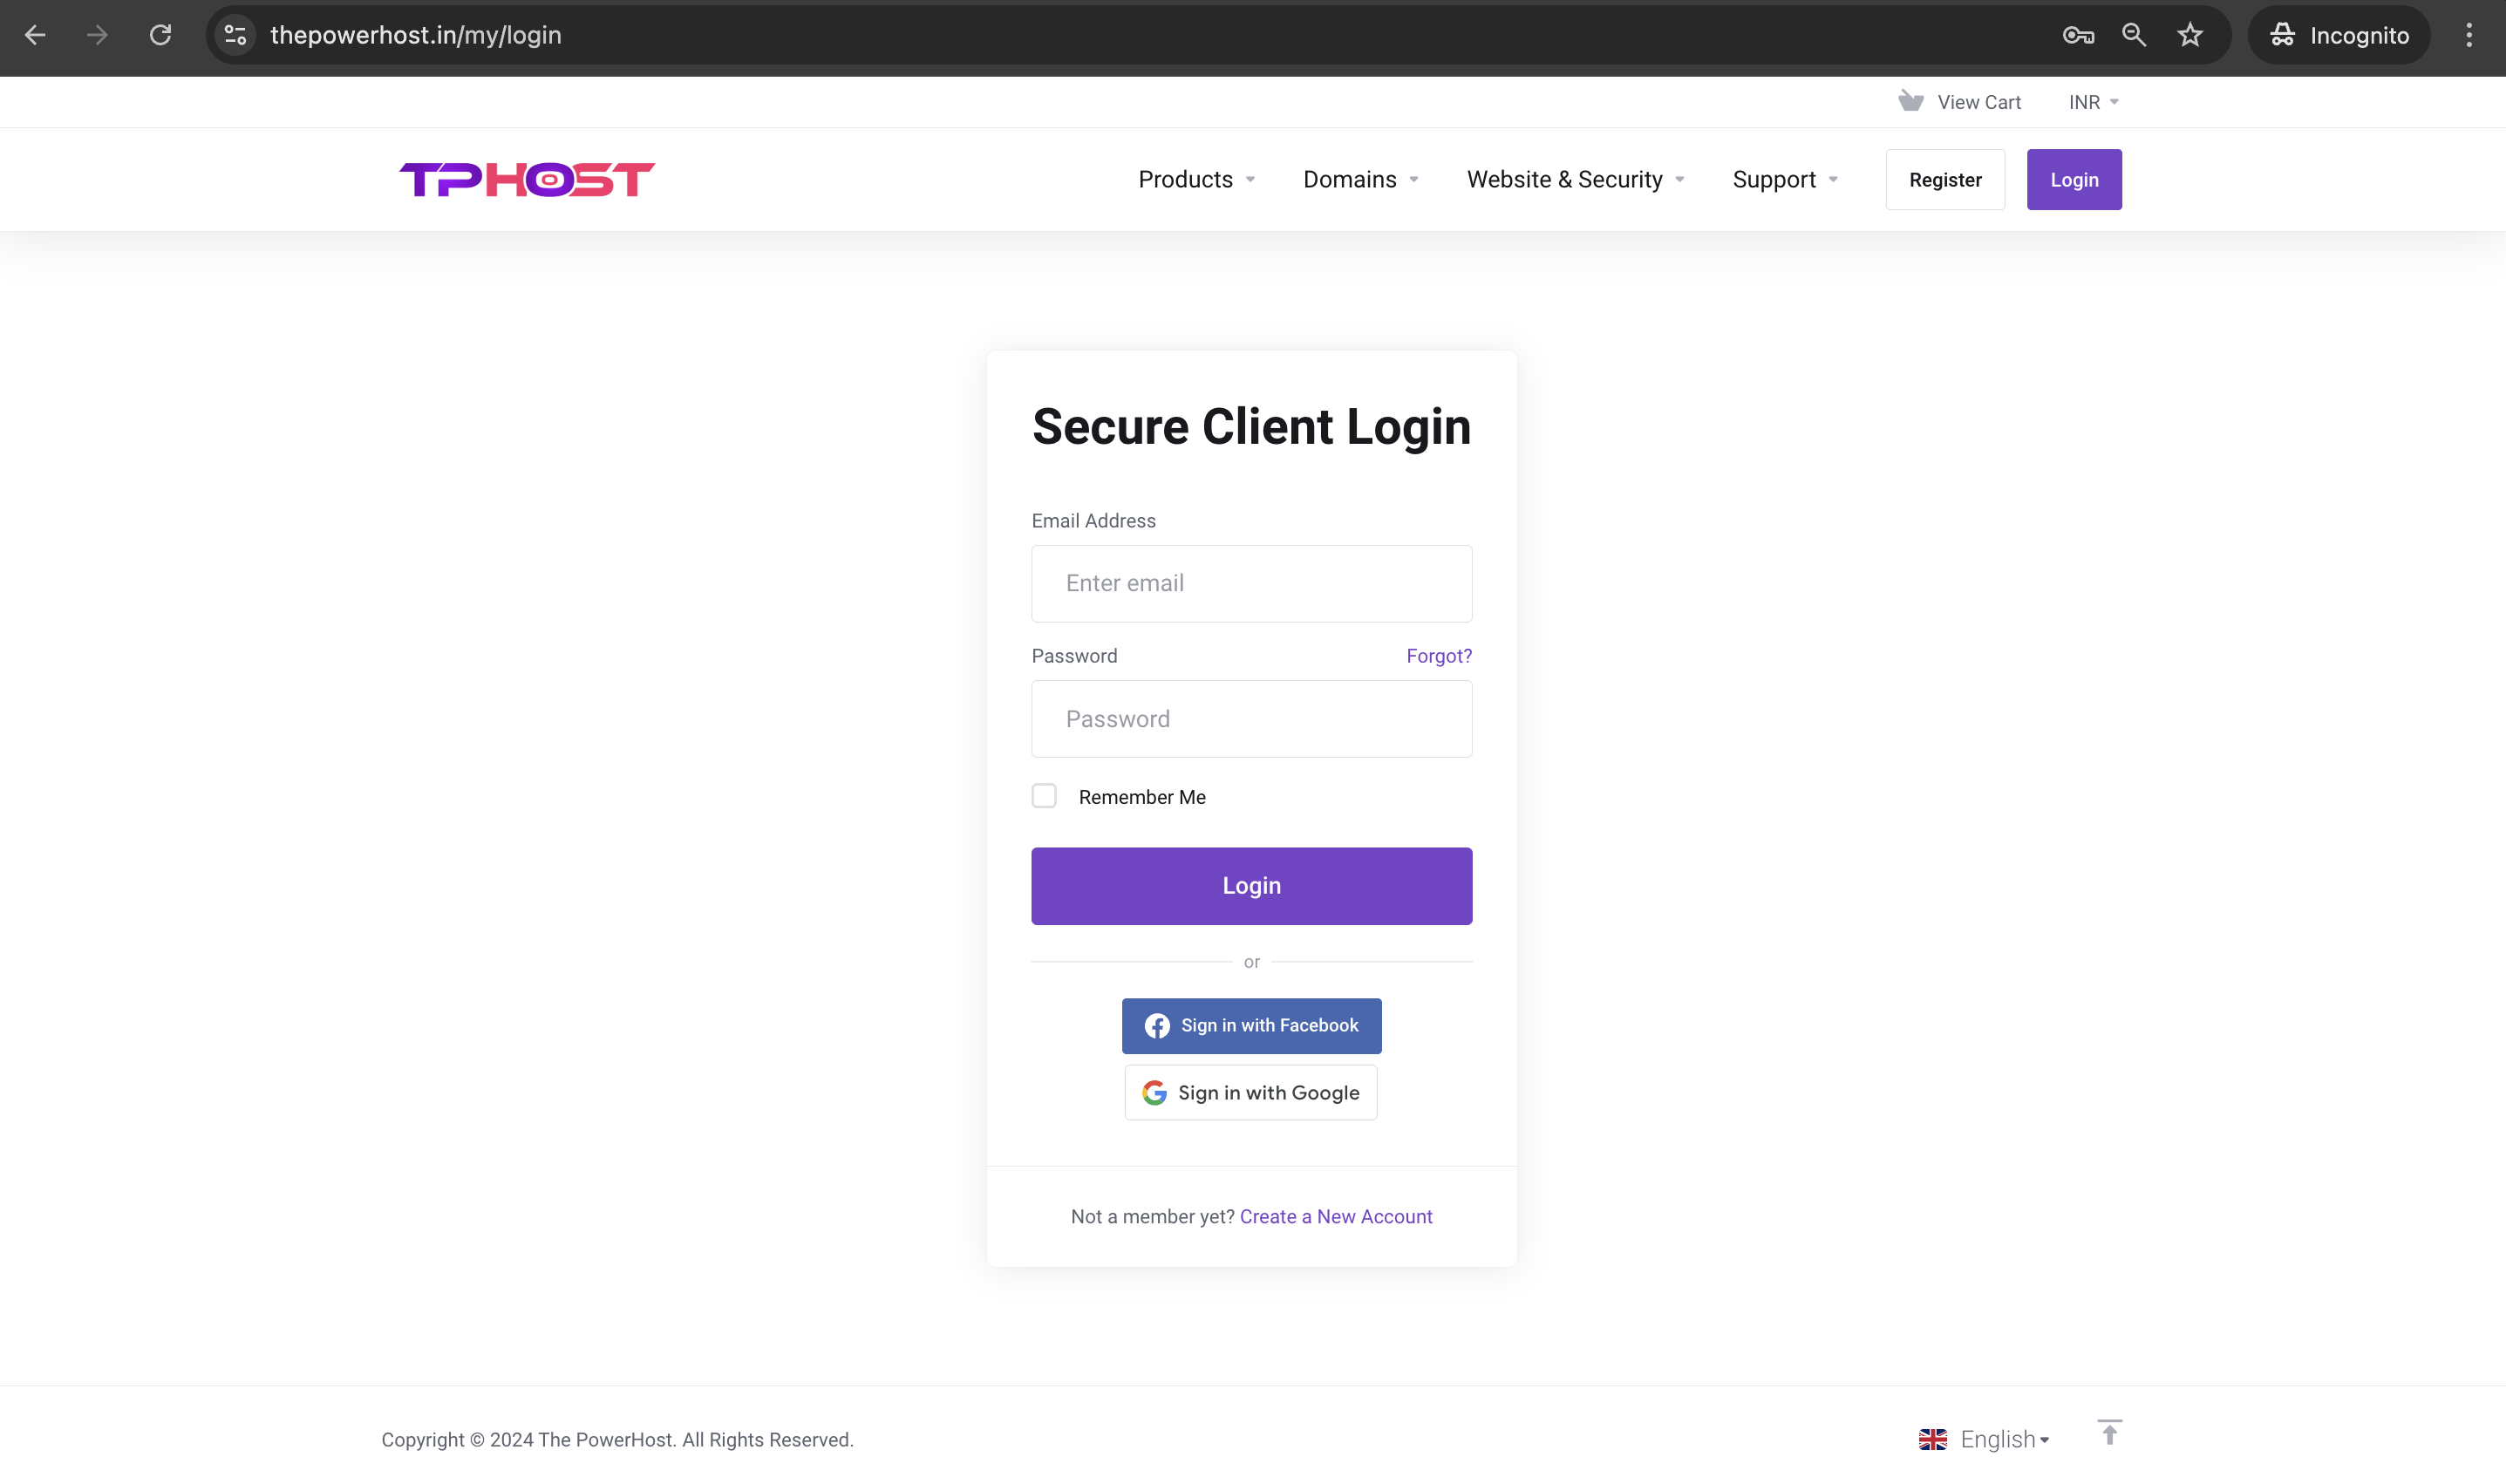
1. Log in to The PowerHost Portal
-
Access the portal by visiting The PowerHost Portal.
-
Enter your login credentials to sign in to your account.

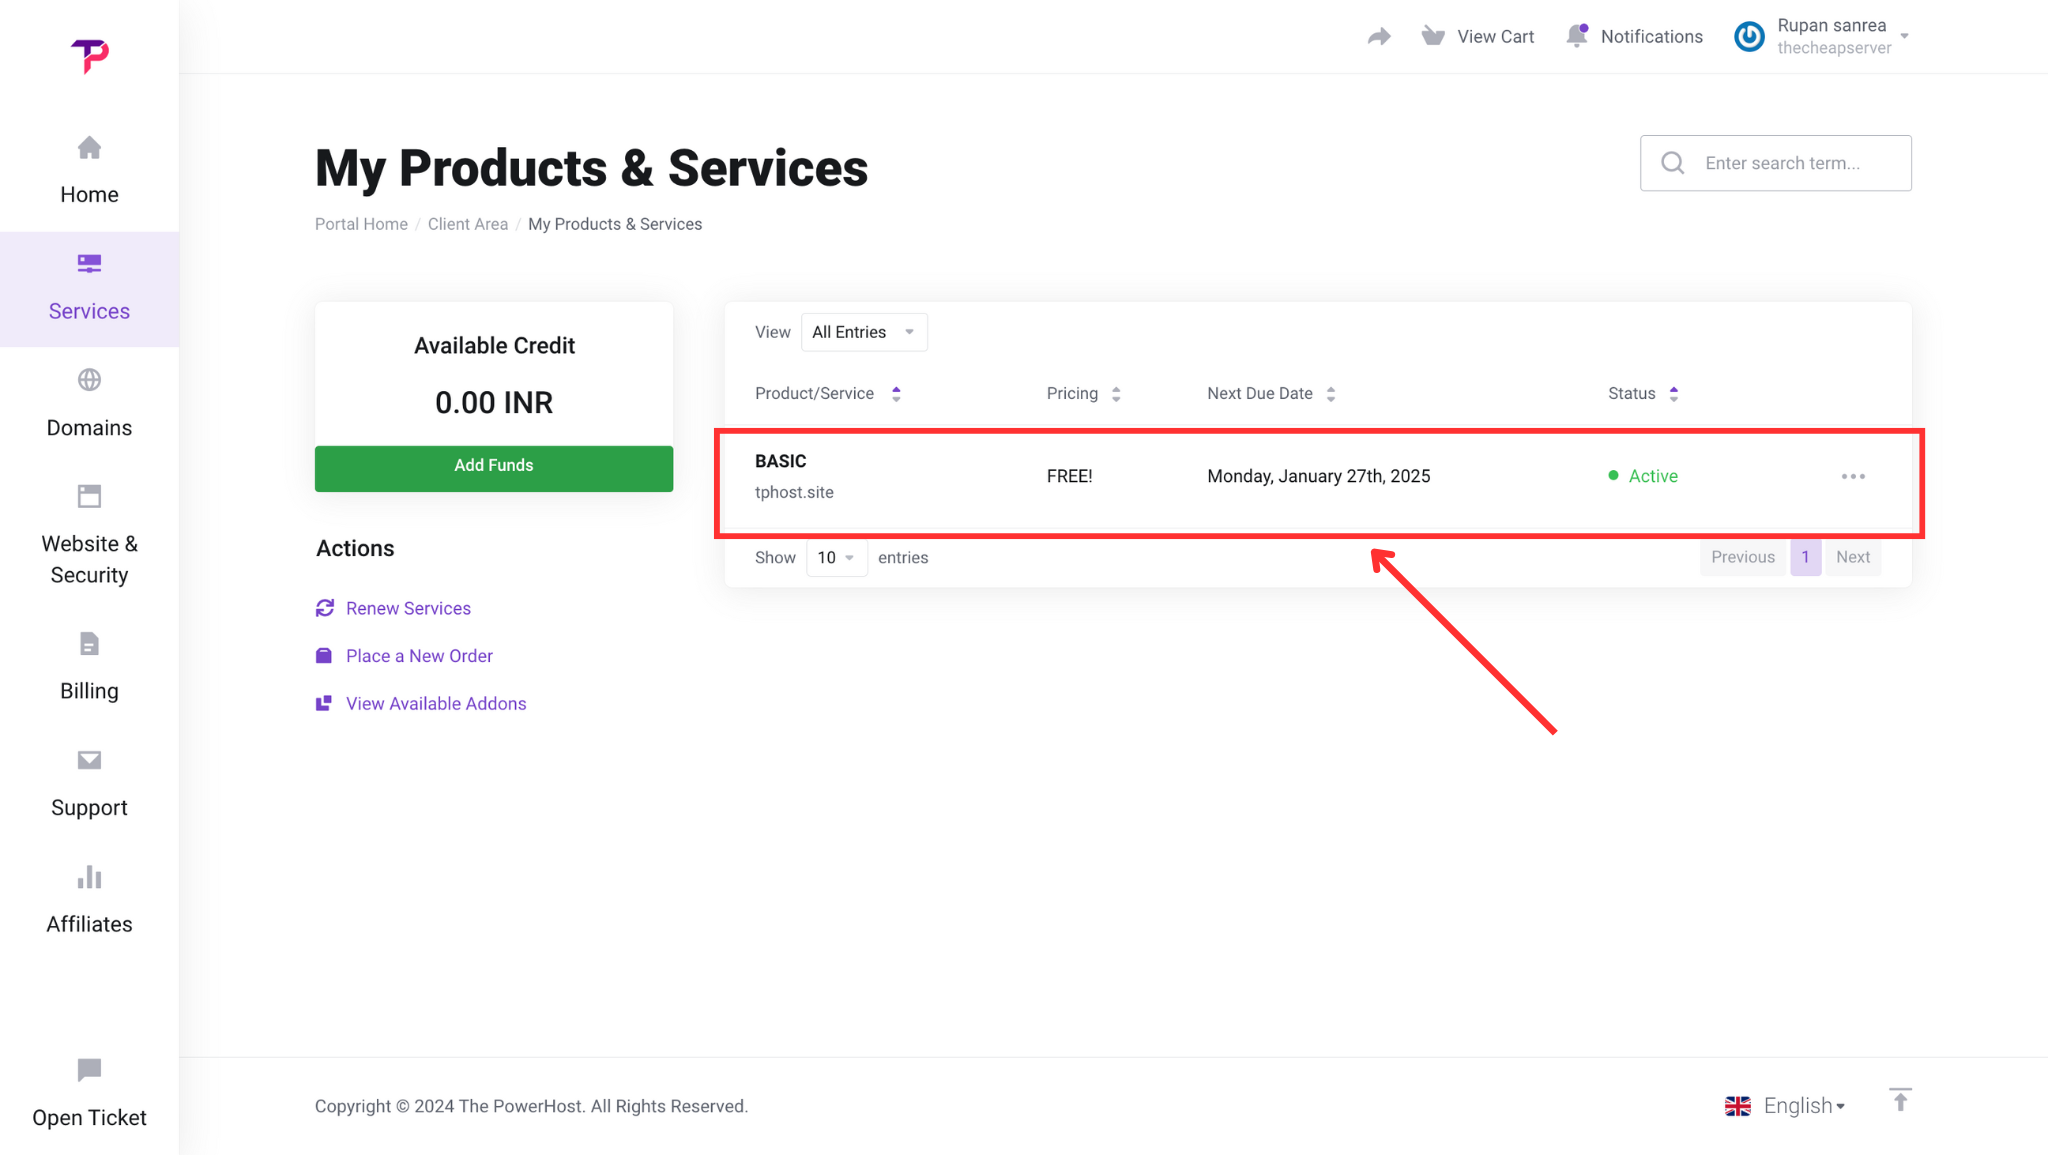
2. Navigate to the Services Section
-
Once logged in, click on the Services tab.
-
Here, you will see a list of all your active services and plans.

3. Select the Service for Cancellation
-
Identify the service you wish to cancel.
-
Click on the corresponding service to view its details.

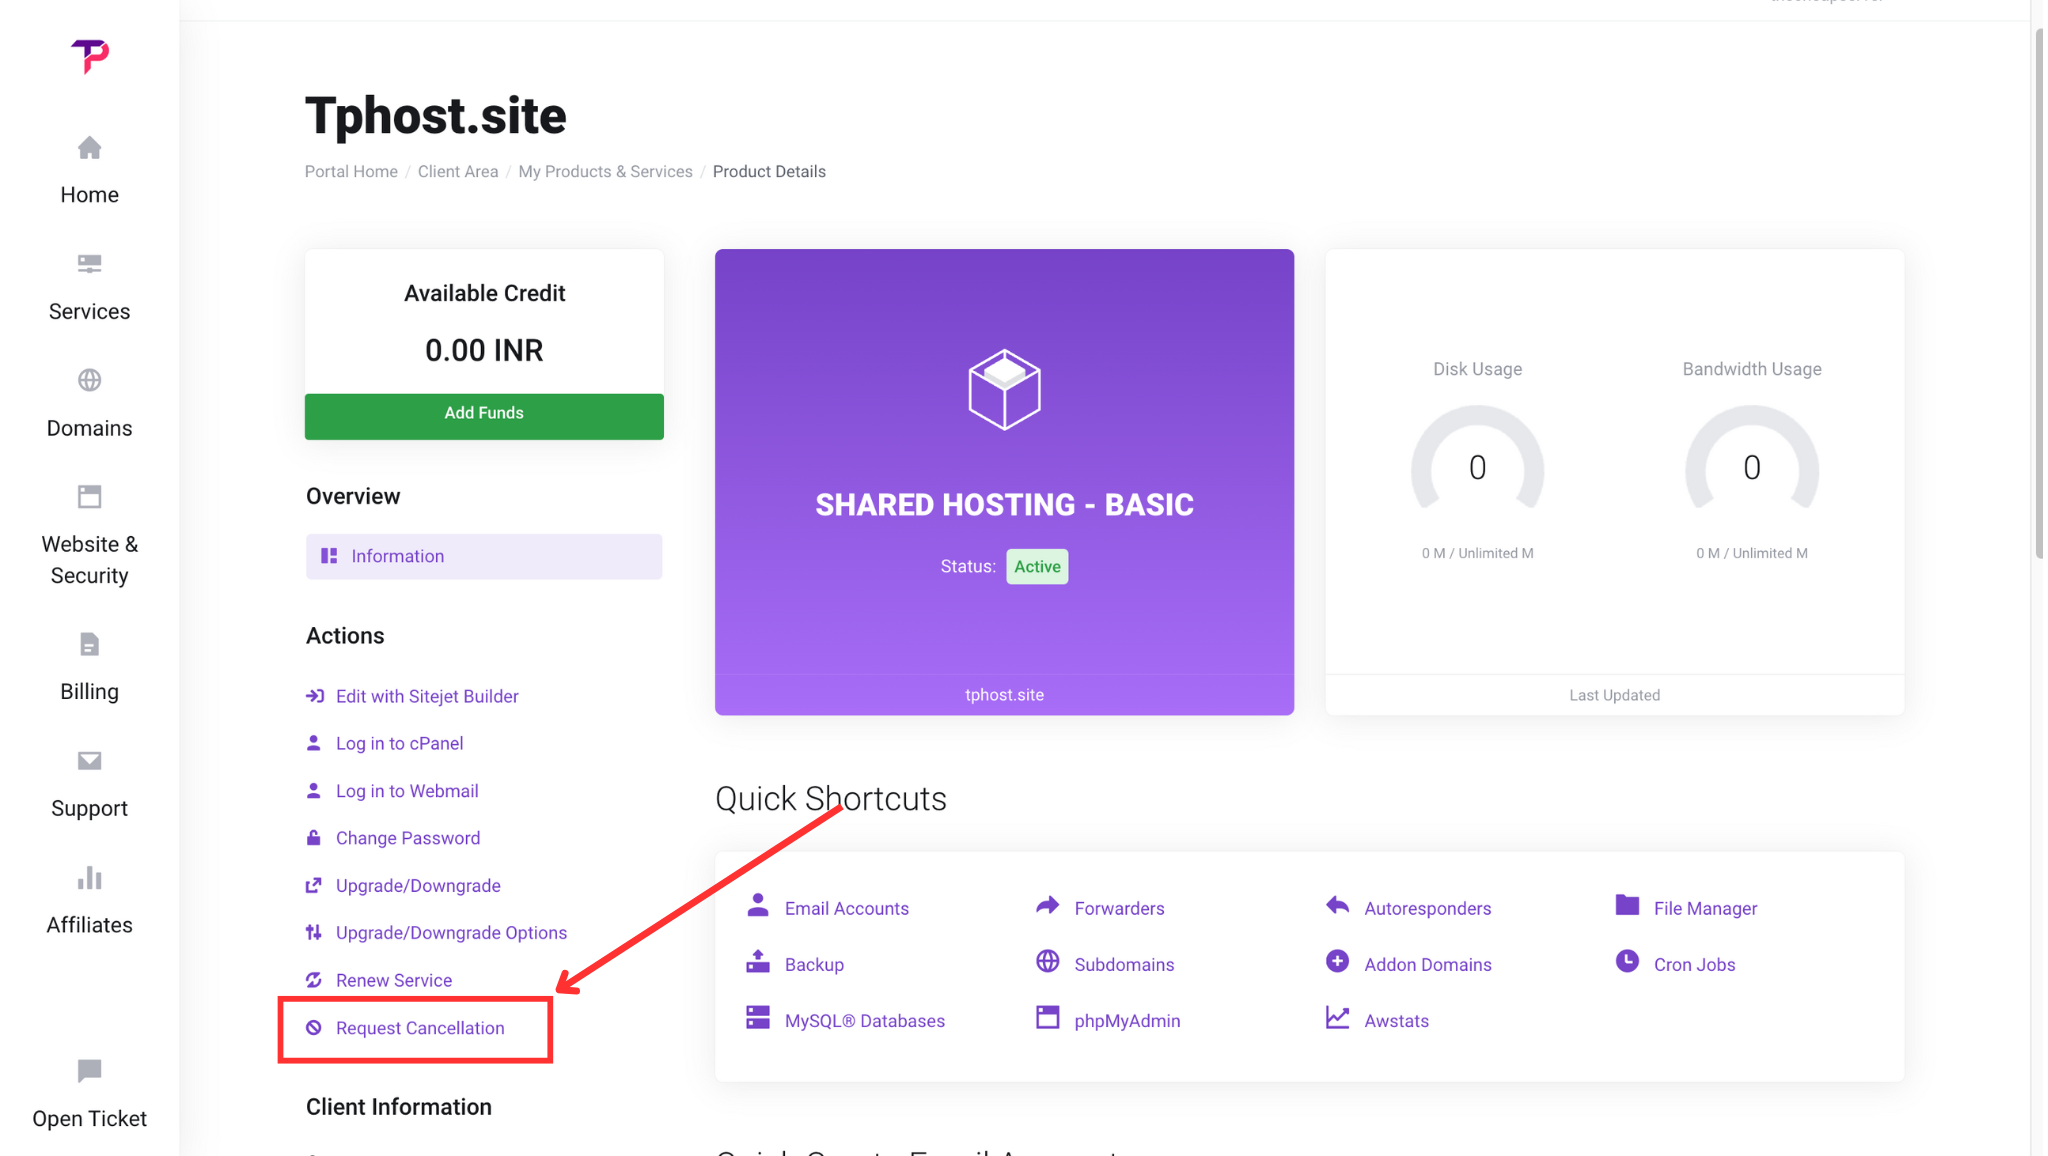
4. Locate the Request Cancellation Option
-
On the left-side action panel, look for the Request Cancellation option.
-
Click on it to proceed.

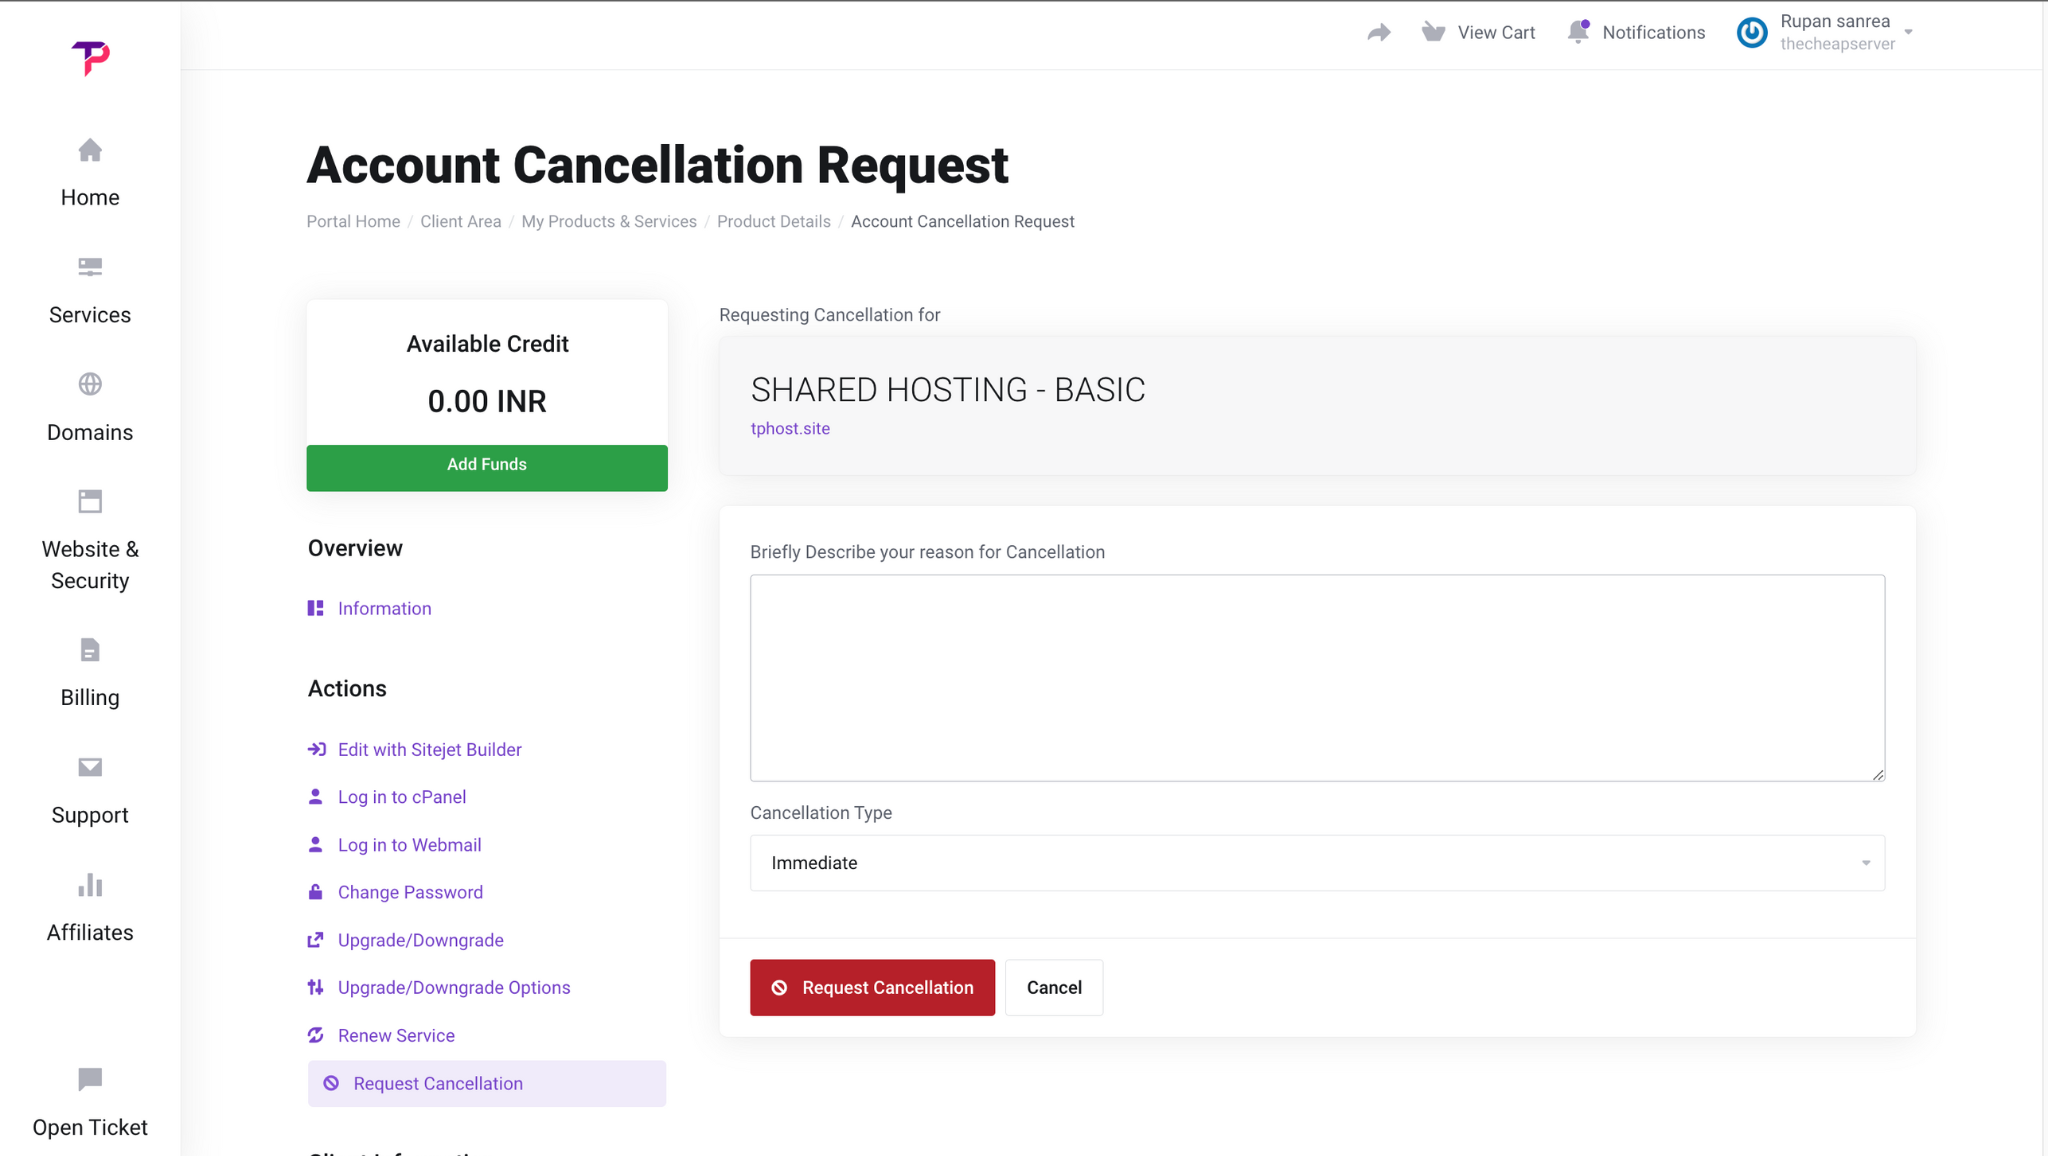
5. Fill in the Cancellation Form
-
Provide the necessary details in the cancellation form.
-
Tick the confirmation checkbox.
-
Choose the type of cancellation (immediate or end-of-billing-period).

6. Submit the Request
-
Once all required details are filled in, click the Submit button.
Your cancellation request will be processed, and you will receive a confirmation notification once it is completed.
For further assistance, feel free to contact our support team.


